最近很多伙伴表示 , 自己还不熟悉Excel表格怎样设置自动添加外边框操作,为了让大伙方便入手操作 , 这里经验啦专门了关于Excel表格设置自动添加外边框的详细方法,有需要的朋友不要错过哦 。
Excel表格设置自动添加外边框的详细方法

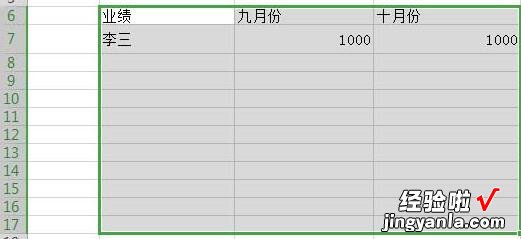
1、打开Excel文件

2、选中需添加外边框的区域 。
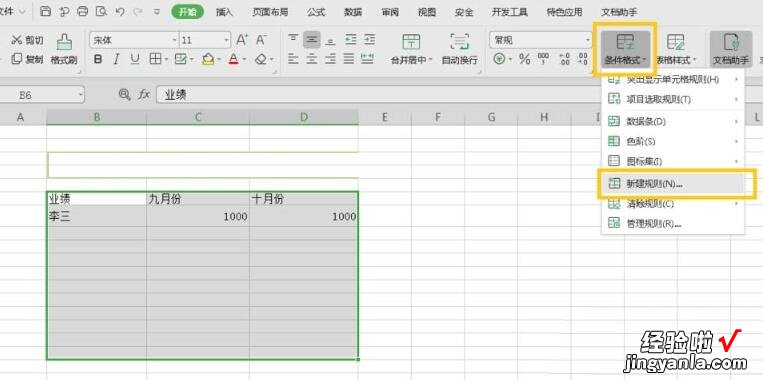
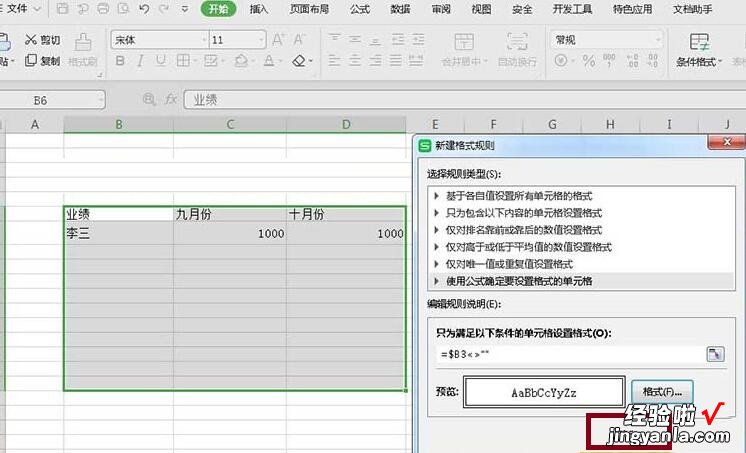
3、点击开始菜单里“条件格式”,选择“新建规则”,
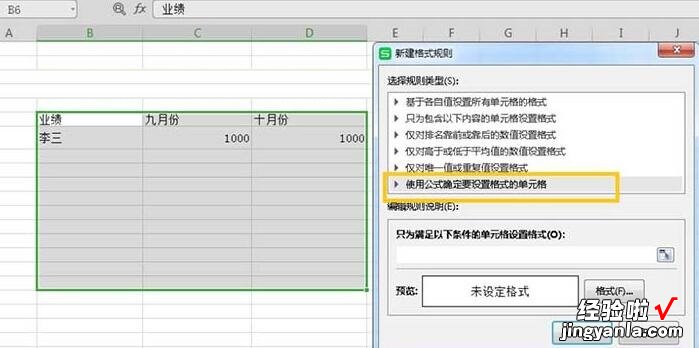
4、对于弹出的对话框,选择“使用公式确定要设置的单元格” 。
【经验啦分享Excel表格设置自动添加外边框的详细方法】
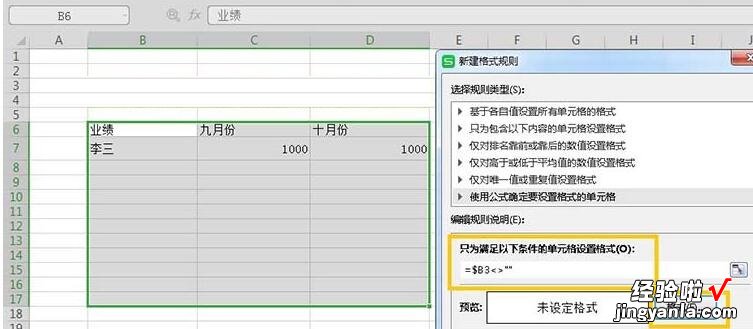
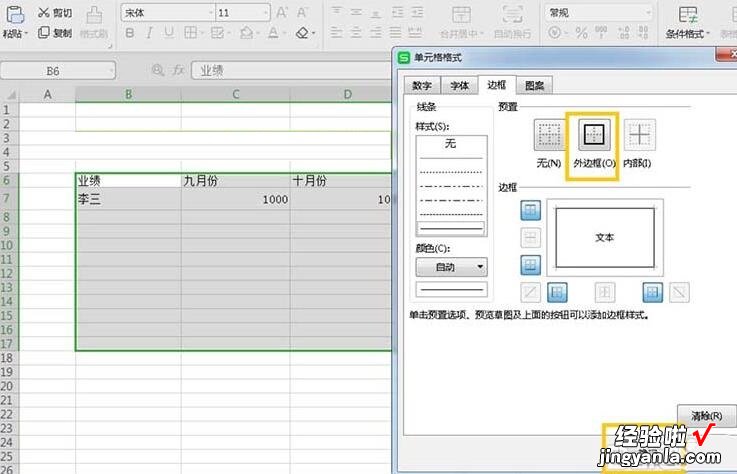
5、在下图黄色框所圈起来的区域内输入=$B3<>\\\”\\\”即可,然后点击格式 。
6、在弹出的对话框里选择“外边框”,点击确定 。
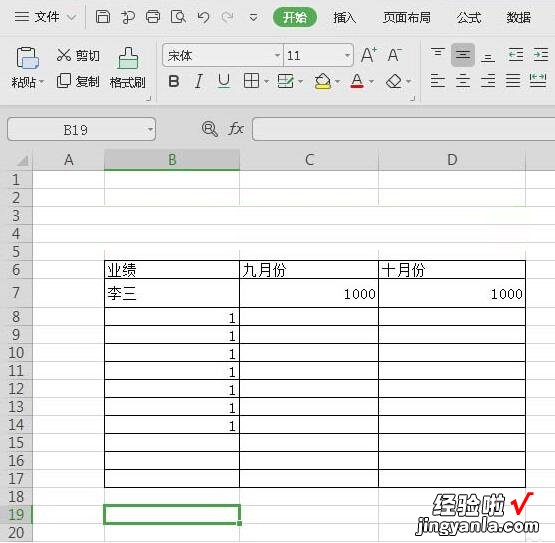
7、如图,最终再点击确定按钮,然后在空白单元格内输入内容即可完成外边框的自动添加 。
上面就是经验啦为大家的Excel表格设置自动添加外边框的详细步骤 , 一起来学习学习吧 。相信是可以帮助到一些新用户的 。