在日常工作中 , 我们经常用word编辑文档,有时为了使文档更加的美观大气 , 可以给文档添加上背景图片 , 今天就来和大家分享如何在word中给文档添加图片背景 。
方法一:填充图片法
单击“页面布局”菜单——>单击“页面颜色”选项——>选择页面颜色下拉列表中的“填充效果……”选项;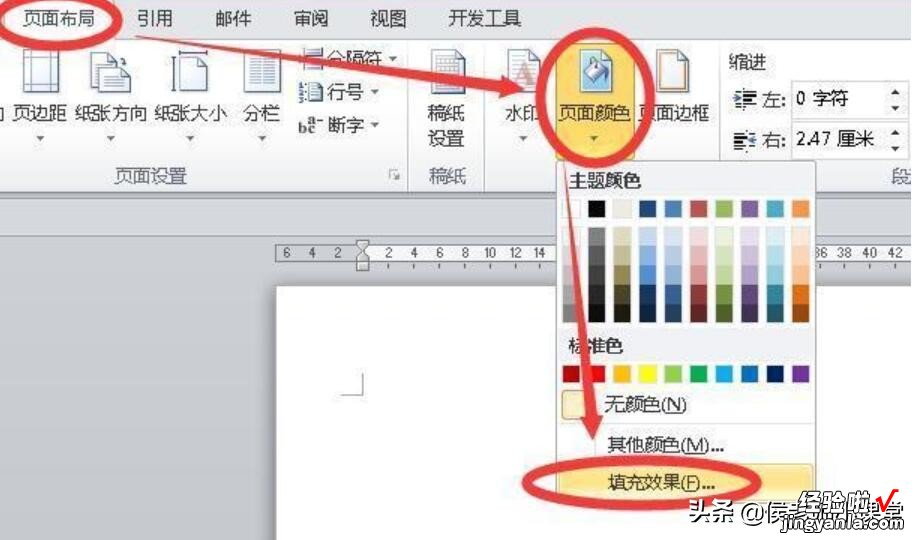
设置页面颜色
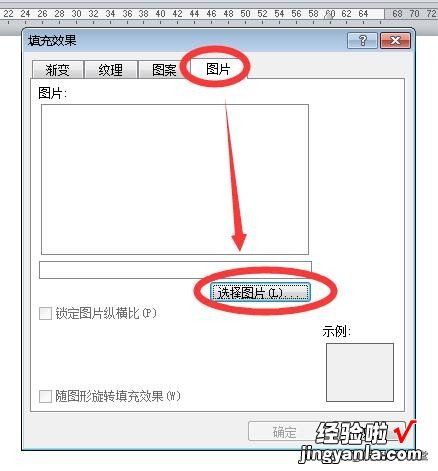
在弹出的填充效果对话框中,单击“图片”标签——>选择其下方的“选择图片”按钮;
【word怎么修改添加背景 如何给word文档添加图片背景】设置填充效果
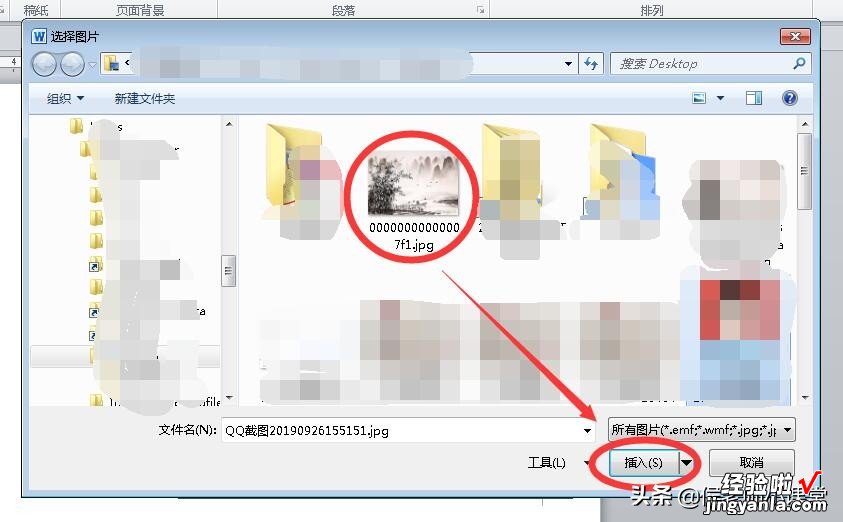
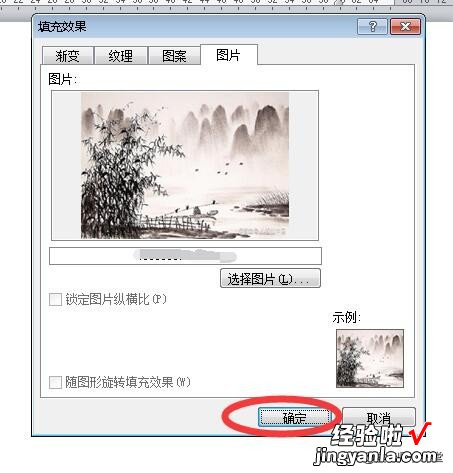
在弹出的选择图片对话框中,找到并选中需要设置为文档背景的图片——>单击“插入”——>返回填充效果对话框 , 单击“确定”即可;
选择图片
插入填充图片
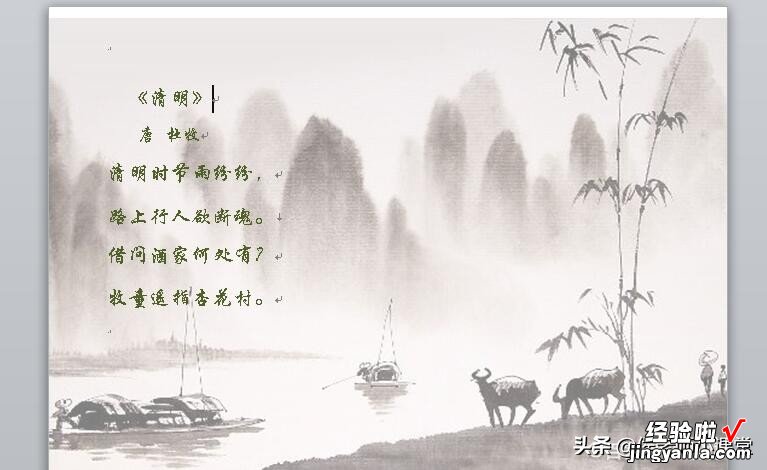
填充图片背景的文档效果如下图 。

文档背景效果1
方法二: 插入水印法
单击“页面布局”菜单——>单击“水印”选项——>选择其下拉列表中的“自定义水印……”选项;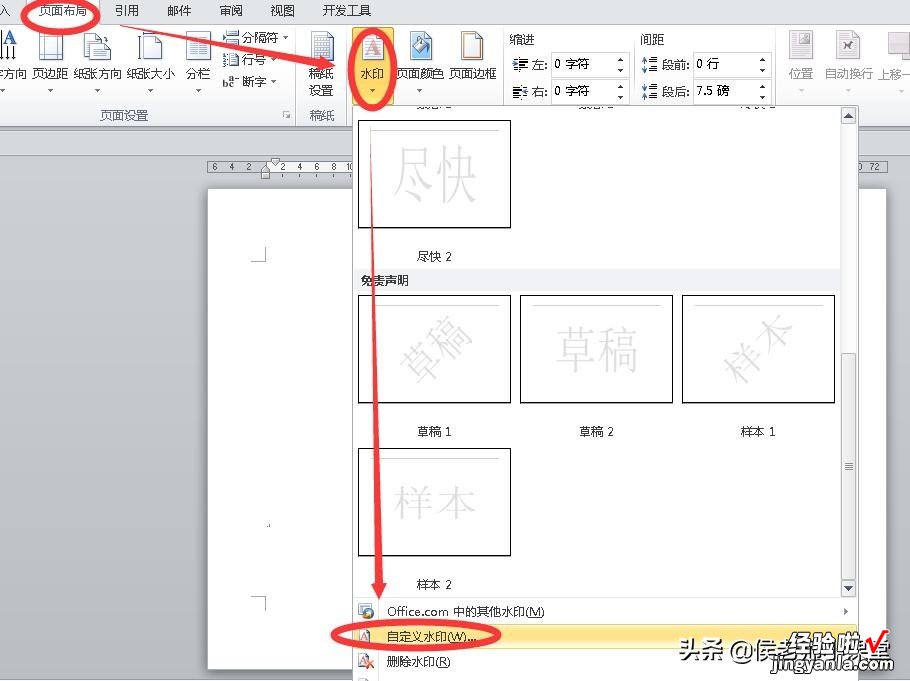
添加水印
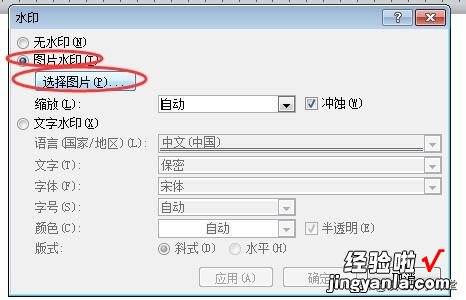
在弹出的水印对话框中,单击“图片水印”单选项——>选择其下方的“选择图片”按钮;
设置图片水印
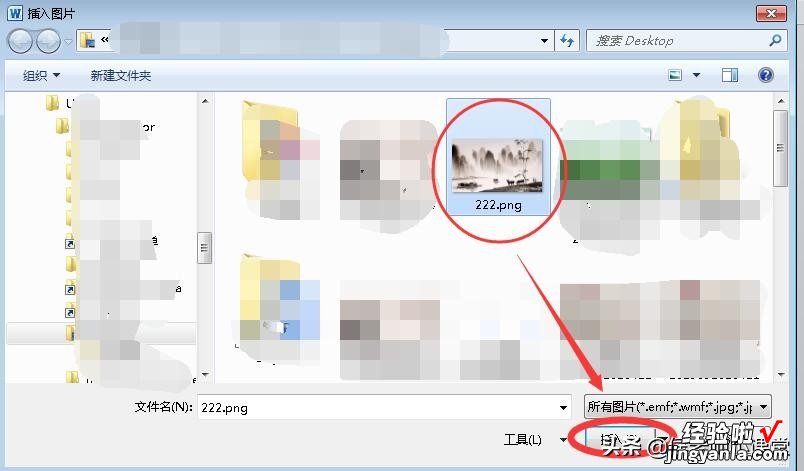
在弹出的插入图片对话框中,找到并选中需要设置为文档背景的图片——>单击“插入”;
插入图片
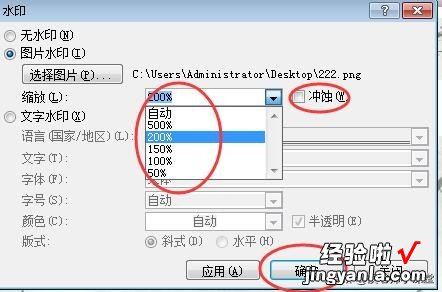
回到水印对话框,在缩放下拉选项中,选择合适的“缩放”比例——>在其右侧可以选择是否勾选“冲蚀”效果——>然后单击“确定”即可;
缩放与冲蚀
添加了水印图片背景的文档效果如下图 。
文档背景效果2
方法三: 插入图片法
单击“插入”菜单——>单击“图片”——>在弹出的插入图片对话框中,找到并选中需要设置为文档背景的图片——>单击“插入”;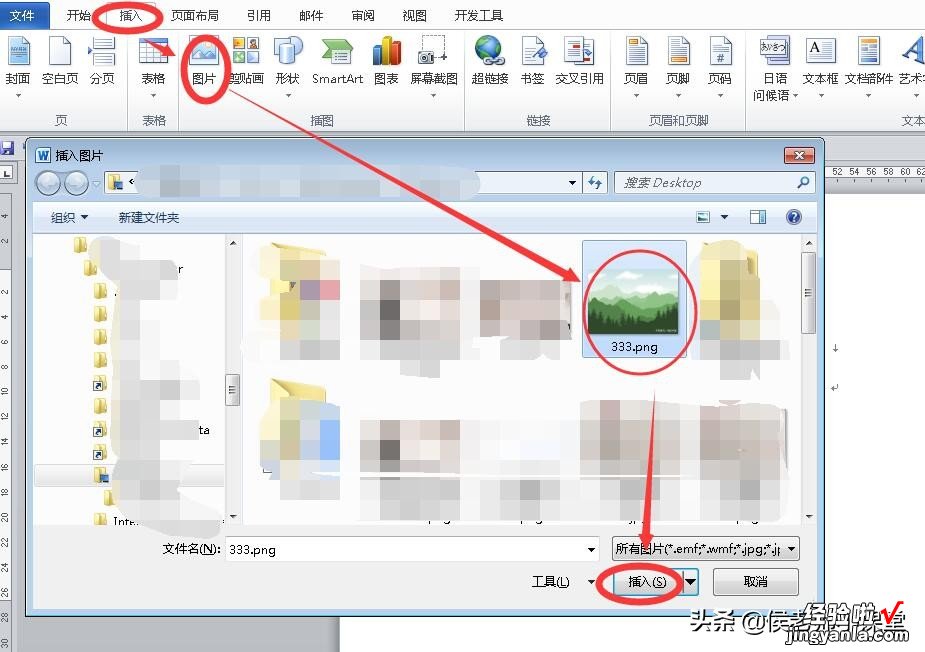
插入图片
这时刚才选中的图片已经插入到了文档中,选中图片——>单击“格式”菜单——>选择“自动换行”下拉列表中的“衬于文字下方”选项;
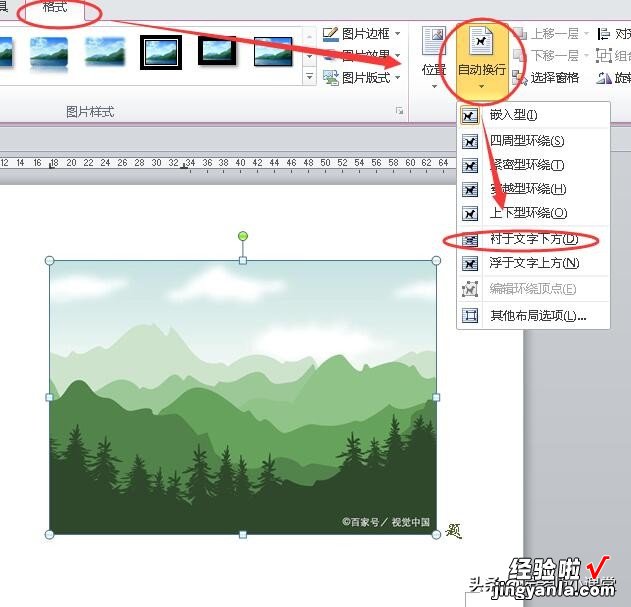
衬于文字下方
这时图片已作为背景衬在文字下方,但图片大小与页面不匹配,需要拖动图片周围的8个控制点 , 将图片大小调整到覆盖住整个页面即可 。
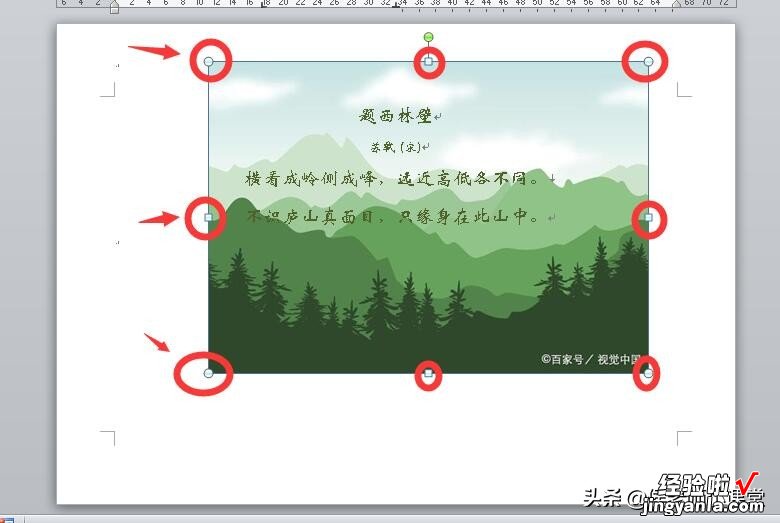
调整图片大小
插入了图片背景的文档效果如下图 。

文档背景效果3
注意:
方法一和二设置完成后 , 文档的所有页面背景均统一为当前页设置的背景 。
方法三设置的背景则只对当前页面有效 , 文档的其它页面还可以另外再设置成不同的背景 。